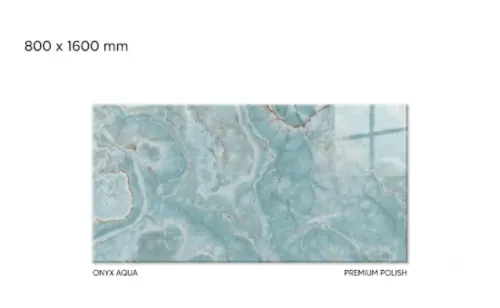
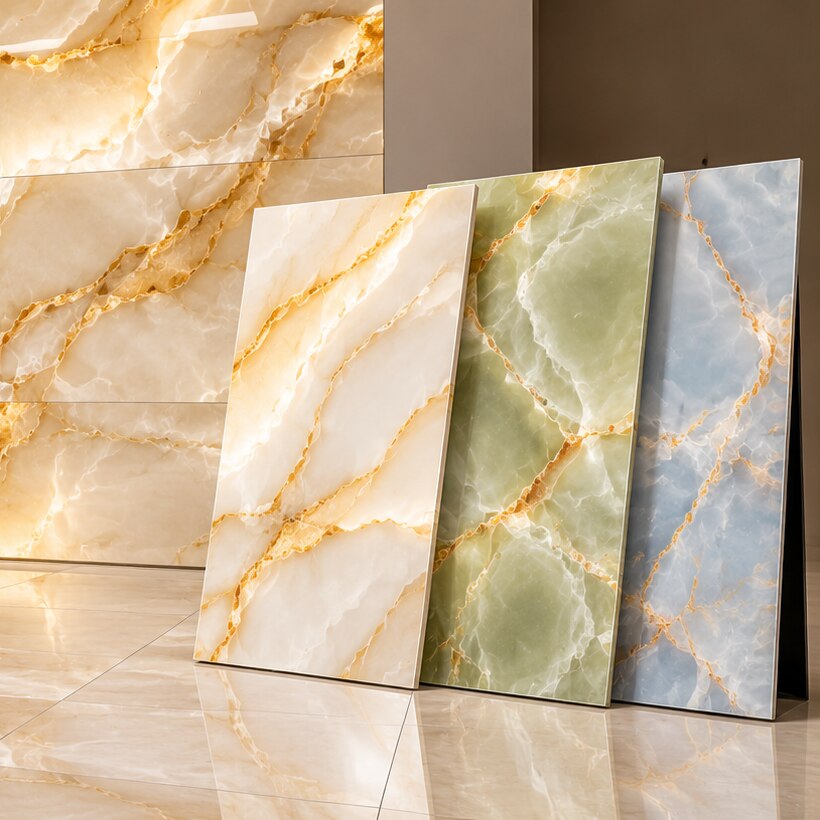
A convincing onyx feature depends on more than a glossy surface or a dramatic showroom sample. You will be able to distinguish genuine stone from onyx-look tile, choose a suitable location, plan lighting and layout, and give a dealer and installer the information needed for a controlled result.
Key takeaways
- Confirm whether the product is calcitic onyx, not merely labelled onyx tile.
- Use backlighting only after checking translucency, colour variation and access for repairs.
- Inspect every tile for cracks, resin fills, edge damage and shade differences.
- Specify a stable substrate, compatible adhesive and full-size dry layout before installation.
Which Material Is Actually Being Sold as Onyx Tile?
Natural onyx is stone, but “onyx tile” does not guarantee true silica-based onyx. Most architectural products sold under this name are calcitic onyx, a softer stone that scratches more readily than granite and can etch when exposed to lemon juice, vinegar or acidic cleaners.
Natural onyx slabs also vary in background colour, banding, fissures, filled veins and translucency, so a small sample cannot predict an entire wall.
| Option | What it means | What to verify |
|---|---|---|
| Natural onyx slabs | Quarried calcitic stone cut into slabs or tiles; every piece has individual veining and light transmission. | Approve a dry-lay composition, shade range, fissures, fills, thickness and finish before installation. |
| Onyx-look porcelain or vitrified tile slabs | Factory-made material with a printed or pressed pattern; low absorption and more consistent sizing than stone. | Check whether the design repeats, whether the body is coloured, and whether the product is genuinely translucent or only glossy. |
| Printed ceramic imitation | Ceramic tile carrying an onyx image in its surface glaze or print. | Inspect image repetition, edge appearance, wear rating and suitability for the wall location. |
Choose natural onyx for geological variation and authentic translucency, not predictable uniformity. Choose porcelain or ceramic when consistent maintenance and replacement matter more. A polished surface alone proves nothing about backlighting; request product identification, technical data, thickness, finish and the available lot or batch before approving the statement wall.
Where Will an Onyx Feature Wall Create the Most Impact?
A living-room feature wall usually gives onyx the best balance of visibility, protection and controlled lighting. Choose it where viewers can stand close enough to see the banding, but not so close that every fissure, filled vein or joint becomes the dominant detail.
| Location | Why it works | Decision checks |
|---|---|---|
| Living room | Broad, uninterrupted backdrop for seating and artwork | Use diffused light; grazing light will expose lippage and wall irregularities |
| Entry foyer | Immediate visual impact for arriving guests | Protect against bags, shoes and repeated contact; assess viewing distance from the doorway |
| Bar front | A compact surface that benefits from translucency and contrast | Keep spills from sitting on the stone; plan lighting before cabinetry is fixed |
| Bathroom wall tiles | Adds drama in a protected, low-traffic vertical area | Confirm moisture exposure, compatible sealing and prompt spill cleaning; avoid treating onyx as waterproof |
| Reception desk or fireplace surround | Frames a focal point visible across a larger room | Select stronger veining and larger patterns, since fine detail disappears from far away |
For showers, wet bars and other high-moisture locations, verify the stone’s absorption and maintenance demands before approval. A sealer slows liquid penetration; it does not make natural onyx stain-proof or acid-proof.
Keep decorative onyx indoors unless a project review confirms climate exposure, freeze–thaw suitability and the anchoring or setting method. Protected interiors offer better control over moisture, traffic and light.
How Should Backlighting and Surface Finish Be Specified?
A glossy face does not prove that a tile will transmit light. Confirm it with a cut sample matching the proposed thickness, colour and backing, then test it with the same light source and distance planned for the wall.
A small showroom sample can hide dark areas and uneven veining. Approve a full-size mock-up, including joints and the intended surface finish, before ordering the complete installation.
Specify the backlit onyx system as a complete assembly:
- Use a concealed LED light panel or continuous LED modules rather than bare point lights directly behind individual tiles.
- Set a consistent cavity depth and add a diffuser so the LEDs cannot create bright hotspots.
- Continue the diffuser across joints and around supports to prevent dark bands.
- Provide ventilation and heat management for the LED driver and panel.
- Place drivers, junction boxes and switches in an accessible service compartment, with wiring secured and concealed rather than loose behind the stone.
- Confirm that the wall and backing remain flat; grazing light will exaggerate lippage and substrate waves.
Polished onyx produces strong reflections and glare under spotlights or windows. Choose a honed or satin finish when the wall faces direct light, but check that the chosen finish still delivers the desired translucency.
Record the tile thickness, backing colour, diffuser type, cavity depth, LED colour temperature and access-panel location in the specification so the installed effect can be reproduced.
What Should You Inspect Before Approving the Material and Layout?
Approve the actual pieces and a full dry layout, not a small showroom sample. Natural onyx can change in background, translucency and banding from slab to slab; tile boxes can also vary by batch. Check the following before installation:
1. Inspect slabs or several boxes under the project lighting. Look for chipped corners, cracks, pinholes, surface scratches, uneven polish, resin-filled fissures and loose backing mesh. Mark natural fissures and accepted fills separately from transport damage. Record the batch, shade range, aqua and honey colour variation, and the pieces rejected.
2. Measure tile length, width, thickness and edge squareness across multiple pieces. Use those measurements to approve the grout joint; rectified manufactured tiles may suit tighter joints, while non-rectified stone needs room for dimensional variation and warpage. A narrow joint copied from a rendering can expose uneven edges and create lippage.
3. Lay every piece face-up in sequence and inspect veining continuity from one piece to the next. Confirm the top edge, direction of bands and location of strong marks, especially where grazing light will reveal misalignment.
4. Approve bookmatching on the floor before cutting. Number each piece, photograph the arrangement, and mark the centreline, returns, outlets and cutouts. Obtain written approval for the composition and acceptable variation.
VRINDAVAN GRANITE AND TILES can help document this dry layout, which gives you a reference if the installed wall differs from the approved arrangement. Confirm the backing and adhesive compatibility with the installer before cutting.
Related product
 | Marble Collection /Premium Polish (Marble Collection) from VRINDAVAN GRANITE AND TILES is a premium natural stone that combines luxurious aesthetics with exceptional... View product → |
What Installation Details Keep an Onyx Wall Safe and Consistent?
1. Verify that the wall is sound, dry, plumb and strong enough for the tile, adhesive and any backing system. Check the technical data sheet for the wall-use rating, water absorption, maximum size and setting method; confirm wet-area suitability separately for bathrooms, shower zones or splash-prone locations.
Do not use an interior decorative onyx outdoors without project-specific freeze–thaw and anchoring approval.
2. Correct the substrate before tiling. Remove dust, paint, loose plaster and moisture-damaged material, then flatten high and low spots; tile will follow an uneven wall rather than hide it. Review wall flatness, joint width and grazing-light direction together, because a close light source makes small lippage and surface waves obvious.
3. Select a compatible adhesive from the stone, backing and adhesive manufacturers’ instructions. Mesh, resin or fiberglass backing changes cutting and bonding requirements, while a white adhesive may be specified for translucent or light-coloured onyx. Use the approved grout and movement joints, and keep adhesive out of fissures and joints.
4. Protect the completed feature instead of treating sealer as waterproofing. Apply a compatible sealer where specified, clean spills promptly and use a pH-neutral cleaner; sealer slows absorption but does not prevent acid damage or staining.
Record the layout, batch number and adhesive, keep spare pieces from the approved dry-lay, and provide service access for lighting or concealed systems so a damaged tile can be replaced without dismantling the wall.
Frequently asked questions
What material is usually sold as onyx tile?
Most architectural products labelled onyx tile are calcitic onyx, a softer stone that scratches more easily than granite and can etch from lemon juice, vinegar and acidic cleaners.
Where does an onyx feature wall have the greatest visual impact?
Use it where people pause and view it directly, such as a reception wall, living-room focal wall, bar front or bathroom vanity backdrop. Avoid areas exposed to heavy abrasion or frequent acidic splashes.
How should backlighting and surface finish be specified?
Confirm the tile’s translucency and colour variation first, then specify an evenly distributed LED system with service access. Choose a finish that matches the viewing distance and cleaning demands.
What should you inspect before approving onyx tiles and their layout?
Check the material identity, thickness, dimensions, cracks, resin fills, edge damage, surface marks, shade variation and translucency. Approve a full dry layout before fixing tiles.
Which installation details help keep an onyx wall safe and consistent?
Use a sound, flat substrate, compatible adhesive, controlled joint widths and temporary support where needed. Keep the layout documented and provide access to lighting components for future maintenance.